On the Mobile application - Emails can be sent in bulk from the Map or from individual records as needed.
To learn more about setting up appropriate permissions for using Email functionality - visit the set up article here!
To Access and Send Emails via Map Lasso:
- Click "Map" in the Navigation Bar
- If desired - apply a Filter to the map to focus in on the records you would like to target
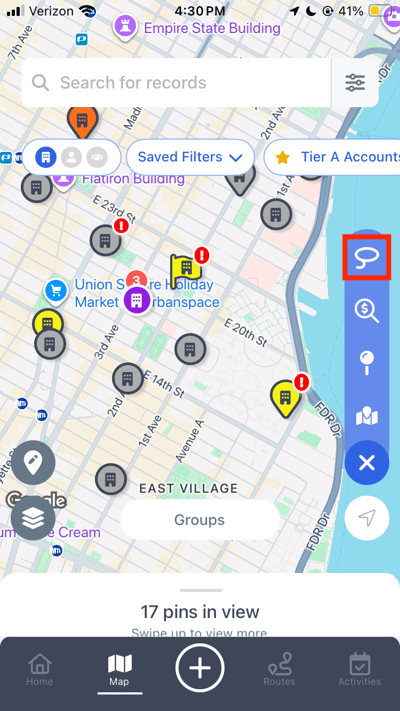
- Select blue wrench icon on the right side of the map then select the lasso
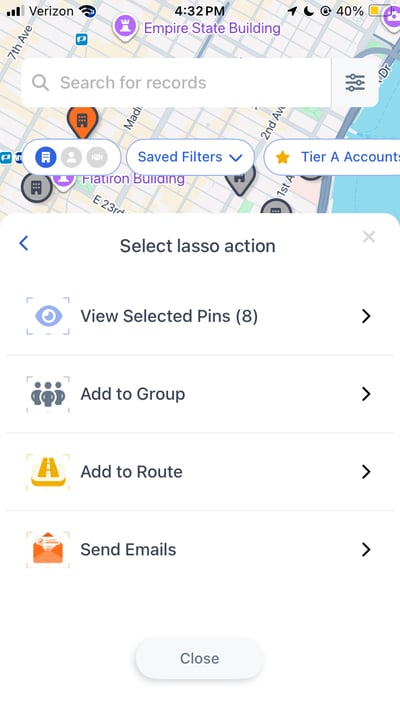
- Circle the records you would like to send an Email to and select the “Send Emails” option in the lasso action popup window that appears
Note: If you have selected Company records - you will have the option to choose to send Emails to the Email listed on the Company record or to the People record(s) associated with the selected Companies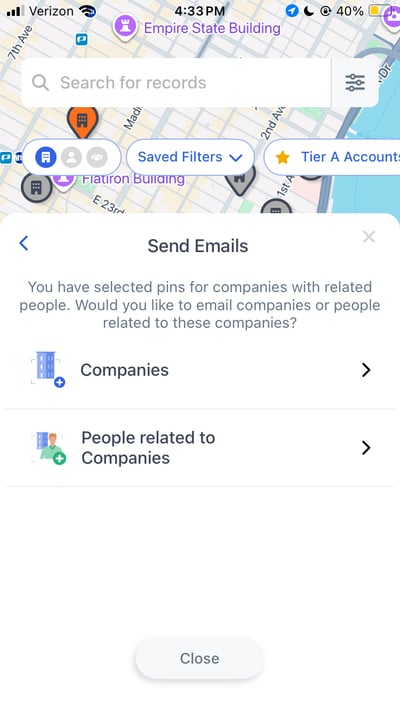
- Use the Email modal pop up to draft your email.
- In the “To” section - review the Companies or People to which the Email will be sent
- In the “Subject” line - populate the Subject that will appear once the Emails are sent via your email provider
- In the “Body” section - type the message you would like to send out!
- Note: If a Signature was set up in the Email Preferences settings - this will automatically appear at the bottom of this modal

- If the “Open Activity Form” Setting is turned off - there will be a blue paper airplane button to finalize the sending of these Emails. If the “Open Activity Form” Setting is turned on or your organization has required fields on the Email Activity form - there will be a blue arrow button in the upper right corner to take you into the Activity form to fill out any required information or make any edits as desired
- If the Activity form has opened - select “Send and Create” to finalize the sending of the Emails and the creation of Email Activities in MMC

- If the Activity form has opened - select “Send and Create” to finalize the sending of the Emails and the creation of Email Activities in MMC
- MMC Email Activities will automatically be created upon sending of the Emails. Review these Activities and any Email tracking of if this Activity such as if the Email has been opened or if links have been clicked in the record Activities tab, the record Email tab, or the Planner
To Send Individual Emails via Record View:
- Navigate to the record that you would like to email via locating the pin on the Map, in the List View, via the search bar or any other method of accessing the record view
- Using the Quick Actions at the top of the record - select the Email option
- If the email icon is grayed out - this indicates that there is no email listed for this record
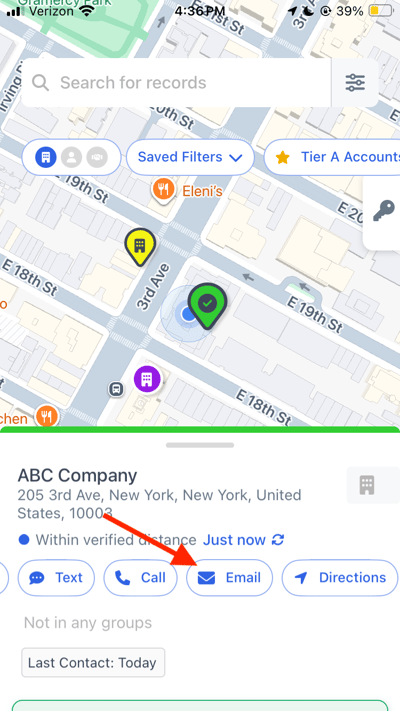
- If the email icon is grayed out - this indicates that there is no email listed for this record
- Select “Send via MMC” to utilize the MMC Email functionality
- Note: Selecting “Send in my client email” will redirect you to your default email client on your device
- Use the Email modal pop up to draft your email.
- In the “To” section - review the Companies or People to which the Email will be sent
- In the “Subject” line - populate the Subject that will appear once the Emails are sent via your email provider
- In the “Body” section - type the message you would like to send out!
- Note: If a Signature was set up in the Email Preferences settings - this will automatically appear at the bottom of this modal
- If the “Open Activity Form” Setting is turned off - there will be a blue paper airplane button to finalize the sending of these Emails. If the “Open Activity Form” Setting is turned on or your organization has required fields on the Email Activity form - there will be a blue arrow button in the upper right corner to take you into the Activity form to fill out any required information or make any edits as desired
- If the Activity form has opened - select “Send and Create” to finalize the sending of the Emails and the creation of Email Activities in MMC

- If the Activity form has opened - select “Send and Create” to finalize the sending of the Emails and the creation of Email Activities in MMC
- MMC Email Activities will automatically be created upon sending of the Emails. Review these Activities and any Email tracking of if this Activity such as if the Email has been opened or if links have been clicked in the record Activities tab, the record Email tab or the Planner
Creating and Using Email Templates:
Templates allow you to save common email formats / messaging that you would like to utilize again in the future.
To create a new email template:
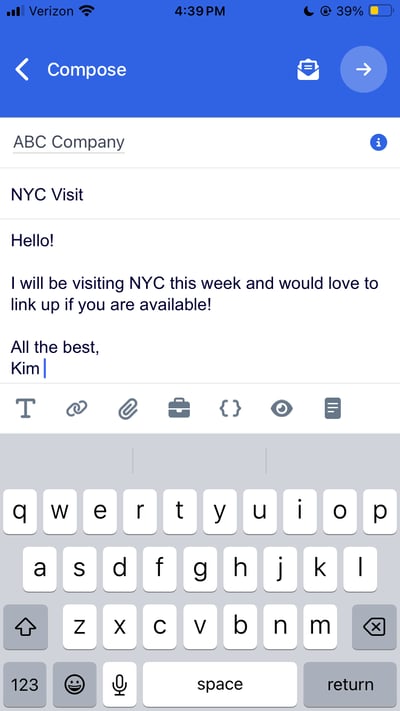
- Following the instructions above from the Map or individual record Email instructions - access the Email modal to start drafting your email
- Upon drafting the email you would like to save as a Template - hit the “Template” button within the bottom icon bar
.png?width=400&height=712&name=IMG_3674%20(1).png)
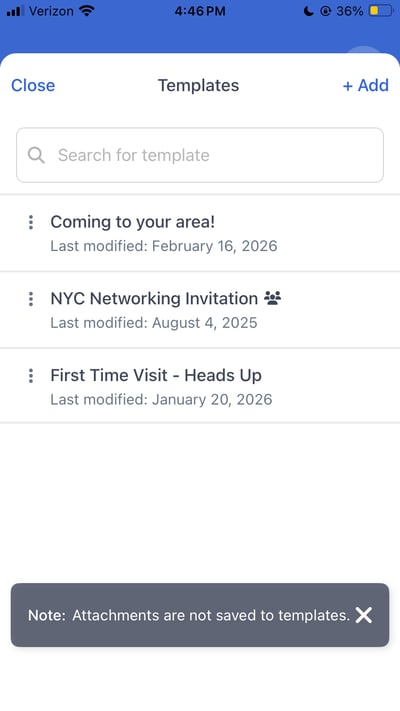
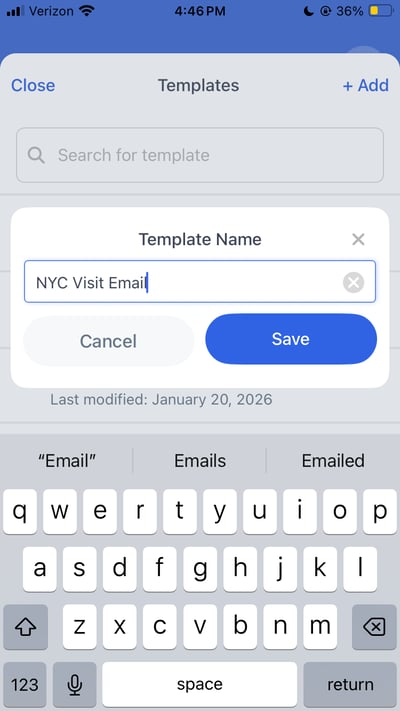
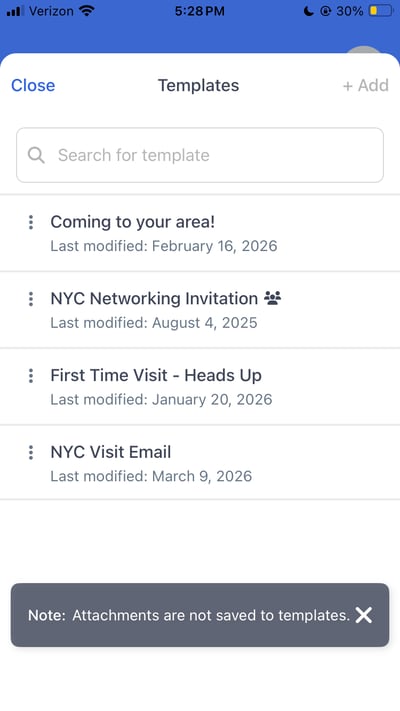
- Select "Add+" in the upper right corner and name the Email Template to quickly use this same message again in future email sends
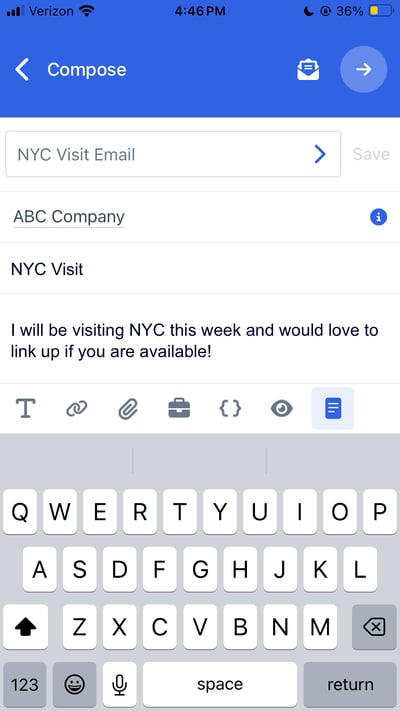
- Upon clicking save - the Template icon will now appear highlighted blue to indicate that a Template is being used
- Proceed through the sending and logging of Email Activity as described in the steps above to finalize the sending and utilization of this Email Template
To use an existing email template:
- Following the instructions above from the Map or individual record Email instructions - access the Email modal to start drafting your email
- Use the Template icon to access and use previously created Email Templates
- Select the Email Template you would like to apply. This will automatically update the subject line and email body in the pop up modal
- Proceed through the sending and logging of Email Activity as described in the steps above to finalize the sending and utilization of this Email Template
To share an email template:
- Following the instructions above from the Map or individual record Email instructions - access the Email modal to start drafting your email
- INPROGRESS
Customizing Emails and Using Dynamic Variables:
Make your emails more impactful by embedding links, attaching files or even including Dynamic variables to better customize the email to the recipient
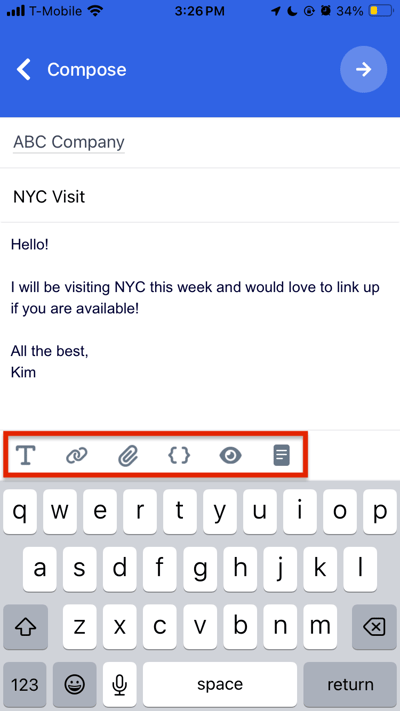
- Formatting Options: Use the T icon in the bottom left corner of email modal to adjust elements such as bolding or italicizing text, adjusting the font size, changing font colors and more
- Insert Link: Use the chain icon by highlighting the text within the body of the email where you would like to embed a redirect hyperlink
- Attach Files: Use the paperclip icon to upload photos, videos, documents, etc. attachments to the email
- Insert Dynamic Variable: Use the bracket icon to add dynamic information such as the Name or Industry into the email to customize what is sent to the end user based on field information that lives in MMC
- Note: If information is blank in MMC - this will also result in a blank in the email sent. Any recipients with blanks or any Dynamic variables with blanks will be highlighted in yellow as a warning

- Note: If information is blank in MMC - this will also result in a blank in the email sent. Any recipients with blanks or any Dynamic variables with blanks will be highlighted in yellow as a warning
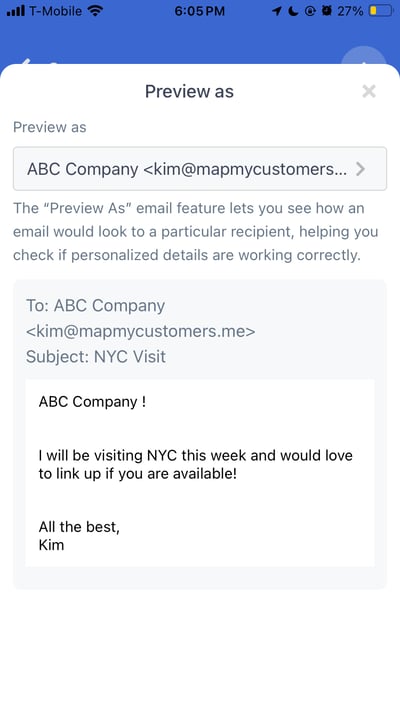
- Preview: Use the eyeball icon to preview the Email to be sent as a particular recipient, helping you check if personalized details are working correctly
Using the AI Email Assistant:
The AI Email Assistant uses your company and contact data to help refine email drafts or generate new emails from scratch based on prompts.
-
You can access it from the Email compose screen by clicking the three-star icon
 in the bottom-right corner.
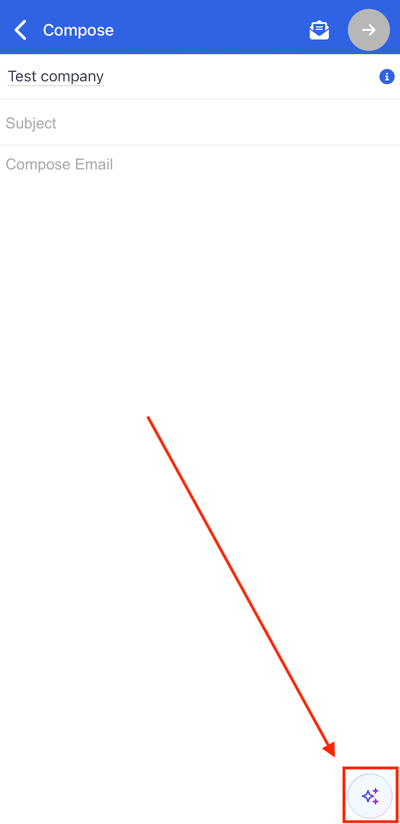
- Once opened enter instructions for the AI Assistant to edit or draft your email.

- The full prompt here was "Check to see if they got the meeting invite for our social event
- After entering a prompt, click the up arrow
 to generate or revise your email. If the result isn’t what you want, you can continue prompting the AI to refine it further. Otherwise you can click the blue checkmark
 to finish prompting.
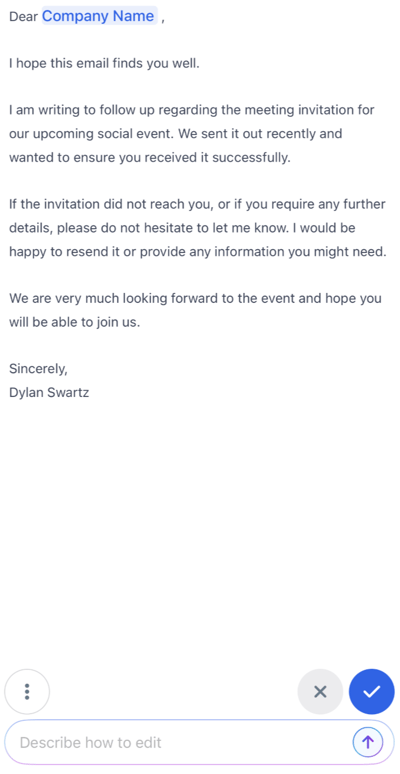
- Once the prompt is approved. You can have the AI suggest a subject for your email by clicking in the Subject line.
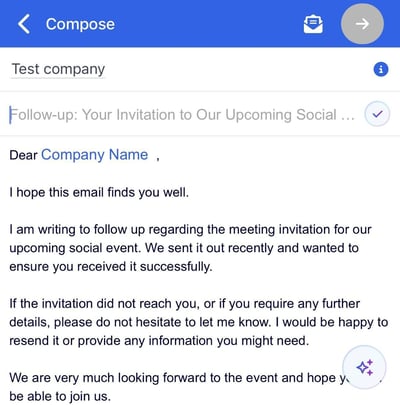
Scheduling an Email:
- You can schedule an email by tapping the paper plane icon
 in the top-right corner of the compose screen.
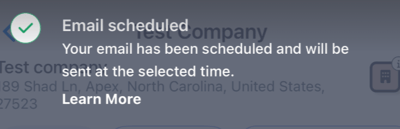
- Select when your email will be scheduled from a set of pre-defined options or a custom date.

- You will receive a notification at the top of the screen when your email has been successfully scheduled.
- You will receive a notification at the top of the screen when your email has been successfully scheduled.
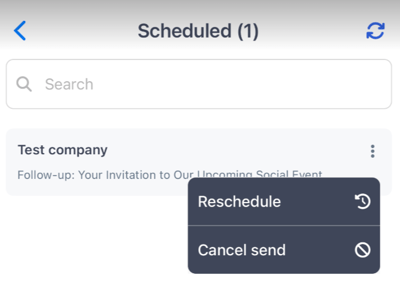
- You can view your scheduled emails by navigating to your Email Outbox by clicking on your profile icon in the top right.

- Select Scheduled to view your scheduled emails.

- From here you can reschedule or cancel your scheduled emails.
- From here you can reschedule or cancel your scheduled emails.
Email tracking and viewing the logged email:
The sending of Emails via MMC will automatically log an Email Activity Type whether or not the “Open Activity Form” Setting is turned on. Email body, subject, and attachments are automatically added to the activity.
Within the Email Activities send via the MMC functionality - we will also show a binary yes / no value on whether the email has been opened and if any links have been clicked


Additional information about sending Emails via MMC:
- If records are selected with no Email value - these records will not be included in any bulk email sends

- If multiple records are selected with the same email value - a Warning sign and yellow highlight will appear within the “To” section of the email to alert where duplication has occurred
